Few desserts are as comforting and universally loved as Peanut Butter Bars. Rich, creamy, sweet, and topped with a smooth layer of chocolate, these irresistible bars combine two timeless flavors that have delighted dessert lovers for generations. Whether you’re preparing treats for a family gathering, packing desserts for a picnic, or simply satisfying a sweet craving, peanut butter bars are an easy and dependable choice.
One of the best things about this dessert is its simplicity. Most recipes require basic pantry ingredients, come together quickly, and don’t demand advanced baking skills. Some versions don’t even require baking, making them ideal for warm summer days when you want to avoid turning on the oven.
Peanut butter bars are also incredibly versatile. You can make them soft and chewy, crunchy, extra chocolatey, or even healthier with a few ingredient swaps. Their rich flavor and satisfying texture make them popular with both children and adults, while their sturdy shape makes them perfect for lunchboxes, bake sales, holiday cookie trays, and gift boxes.
In this comprehensive guide, you’ll learn everything you need to know about making perfect peanut butter bars, including ingredients, step-by-step instructions, storage tips, creative variations, common mistakes to avoid, and expert advice for bakery-quality results.
What Are Peanut Butter Bars?
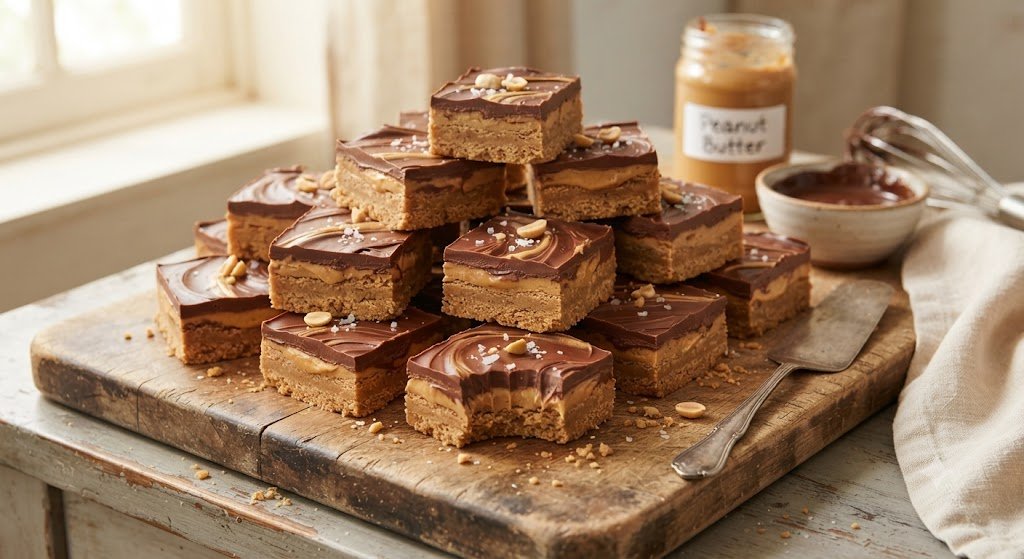
Peanut butter bars are square or rectangular dessert bars made primarily with peanut butter, butter, powdered sugar, and graham cracker crumbs or similar ingredients. Many recipes are finished with a layer of melted chocolate spread over the top.
The flavor is often compared to the filling of a peanut butter cup, but with a softer, creamier texture and a thicker bite. Depending on the recipe, peanut butter bars can be baked or prepared as a no-bake dessert.
Their popularity comes from their rich flavor, simple preparation, and ability to stay fresh for several days.
Why Peanut Butter Bars Are So Popular
Peanut butter bars continue to be a favorite dessert for several reasons.
Easy to Make
Most recipes require minimal preparation and only a handful of common ingredients.
No Special Equipment
You don’t need a stand mixer or fancy baking tools. A mixing bowl, spatula, and baking pan are usually enough.
Great for Any Occasion
Peanut butter bars are suitable for birthdays, potlucks, bake sales, holiday parties, school events, and casual family desserts.
Perfect Balance of Flavors
The combination of salty peanut butter and sweet chocolate creates a flavor pairing that has remained popular for decades.
Excellent for Meal Prep
These bars store well in both the refrigerator and freezer, making them a convenient make-ahead dessert.
Ingredients You’ll Need
One reason these bars are so popular is that the ingredients are affordable and easy to find.
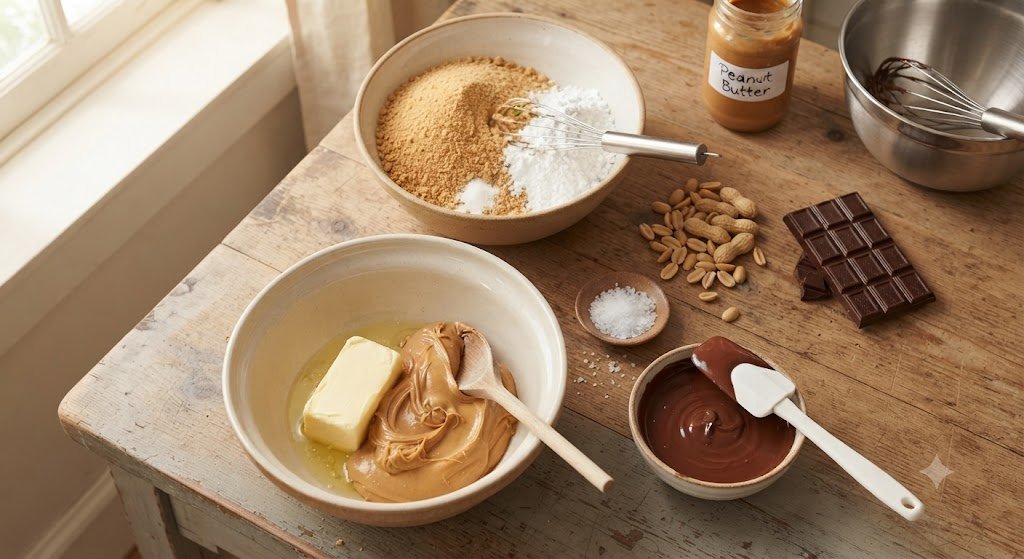
For the Peanut Butter Layer
- Creamy peanut butter
- Unsalted butter
- Powdered sugar
- Graham cracker crumbs
- Vanilla extract
- Pinch of salt
For the Chocolate Topping
- Semi-sweet chocolate chips
- Peanut butter
- Butter
Mixing a little peanut butter or butter into the melted chocolate helps create a softer topping that slices more easily.
Choosing the Best Peanut Butter
The type of peanut butter you choose affects both texture and flavor.
Creamy Peanut Butter
This is the most popular choice because it creates a smooth, rich filling.
Crunchy Peanut Butter
Crunchy peanut butter adds texture and small peanut pieces throughout the bars.
Natural Peanut Butter
Natural peanut butter can be used, but it should be stirred thoroughly before measuring. Because natural varieties contain more oil, the texture may be slightly softer.
Step-by-Step Instructions
Making peanut butter bars is surprisingly simple.
Step 1: Prepare the Pan
Lightly grease an 8-inch or 9-inch square baking pan or line it with parchment paper.
The parchment makes lifting the bars out much easier.
Step 2: Make the Peanut Butter Mixture
In a large mixing bowl, combine:
- Melted butter
- Peanut butter
- Vanilla extract
Stir until smooth.
Gradually add:
- Powdered sugar
- Graham cracker crumbs
- Salt
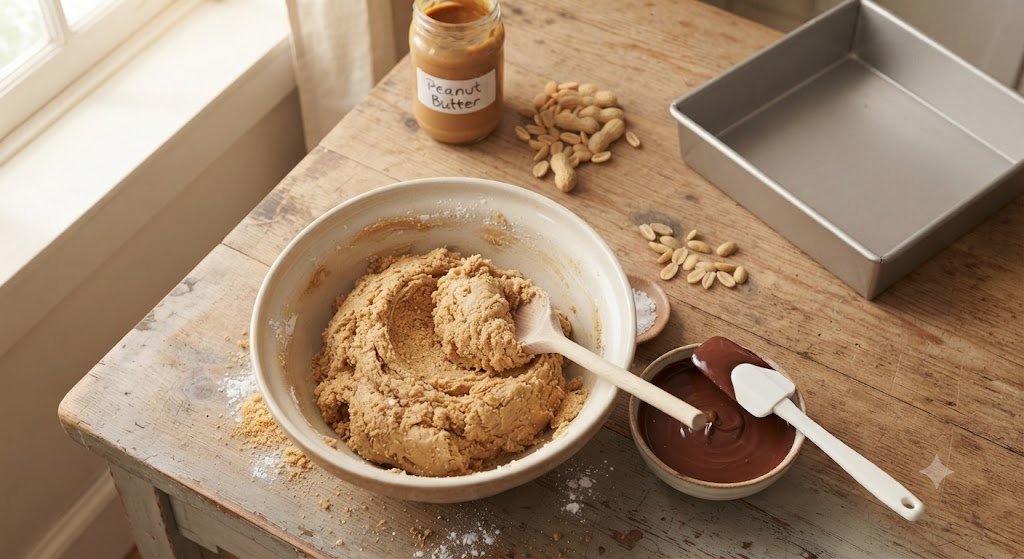
Mix until a thick dough forms.
Step 3: Press into the Pan
Transfer the mixture into the prepared pan.
Press firmly into an even layer using the back of a spoon or an offset spatula.
A flat surface creates neat, professional-looking bars.
Step 4: Prepare the Chocolate Layer
In a microwave-safe bowl or over a double boiler, melt:
- Chocolate chips
- Peanut butter
- Butter
Stir until completely smooth.
Spread evenly over the peanut butter layer.
Step 5: Chill
Refrigerate the bars for one to two hours until fully set.
Step 6: Slice and Serve
Remove from the pan.
Cut into squares or rectangles using a sharp knife.
For extra-clean slices, wipe the knife between cuts.
Expert Tips for Perfect Peanut Butter Bars
Simple techniques can greatly improve your results.
Use Room Temperature Ingredients
Soft butter mixes more evenly and creates a smoother filling.
Don’t Overheat the Chocolate
Heat chocolate gently to avoid scorching or becoming grainy.
Press Firmly
Compact the peanut butter layer well so the bars hold together when sliced.
Chill Before Cutting
Cold bars slice more cleanly and keep their shape better.
Use Quality Chocolate
Since chocolate forms the top layer, using good-quality chocolate chips or baking chocolate noticeably improves flavor.
Delicious Variations
Peanut butter bars are easy to customize.
No-Bake Peanut Butter Bars
Skip the oven entirely and chill the bars until firm.
This is one of the most popular versions.
Chocolate Lovers’ Version
Mix mini chocolate chips into the peanut butter filling before adding the chocolate topping.
Crunchy Peanut Butter Bars
Use crunchy peanut butter and chopped roasted peanuts for extra texture.
Peanut Butter Pretzel Bars
Fold crushed pretzels into the base for a sweet-and-salty combination.
Cookie Butter Twist
Replace part of the peanut butter with cookie butter for a unique flavor.
Oatmeal Peanut Butter Bars
Add rolled oats to create a heartier dessert with a pleasantly chewy texture.
Common Mistakes to Avoid
Even easy desserts can have small challenges.
Using Too Much Powdered Sugar
Excess powdered sugar can make the filling dry and crumbly.
Measure carefully.
Skipping the Chill Time
Warm bars are difficult to slice neatly.
Allow enough time for the filling and chocolate to firm up.
Overmelting the Chocolate
Chocolate that becomes too hot may lose its smooth consistency.
Use low heat and stir frequently.
Uneven Layers
Take time to spread both layers evenly for attractive finished bars.
Fun Ways to Decorate Peanut Butter Bars
Presentation can make homemade desserts even more inviting.
Consider topping your bars with:
- Chopped peanuts
- Chocolate drizzle
- White chocolate drizzle
- Sea salt flakes
- Mini peanut butter cups
- Chocolate sprinkles
- Crushed pretzels
- Peanut butter chips
Decorations should complement the flavors without overwhelming them.
How to Store Peanut Butter Bars
Proper storage keeps the bars fresh and delicious.
Room Temperature
Store in an airtight container for up to three days if your kitchen is cool.
Refrigerator
Refrigerate for up to one week.
The chilled texture also makes the bars easier to serve.
Freezer
Wrap individual bars tightly in plastic wrap before placing them in a freezer-safe container.
Freeze for up to three months.
Thaw in the refrigerator or at room temperature before serving.
Serving Ideas
Peanut butter bars are delicious on their own, but they also pair well with a variety of drinks and desserts.
Serve them with:
- Cold milk
- Fresh coffee
- Hot chocolate
- Vanilla ice cream
- Chocolate ice cream
- Fresh strawberries
- Banana slices
These pairings balance the rich peanut butter flavor beautifully.
Nutritional Considerations
Peanut butter bars are an indulgent dessert, but they also provide some nutritional value from peanut butter.
Peanut butter contains protein, healthy unsaturated fats, vitamin E, magnesium, and niacin. While the bars are also high in sugar and calories, enjoying them in moderation allows them to fit into a balanced eating pattern.
For a lighter version, you can reduce the sugar slightly, use dark chocolate instead of milk chocolate, or substitute part of the butter with Greek yogurt in baked variations.
Why Peanut Butter Bars Are Perfect for Every Occasion
One of the reasons these bars have remained popular is their versatility.
They’re sturdy enough to travel well, making them an excellent choice for potlucks, bake sales, picnics, and lunchboxes. They can be prepared days in advance, decorated for holidays, or packaged as homemade gifts. Their familiar flavors appeal to a wide range of tastes, making them a reliable dessert for gatherings large and small.
Whether you’re serving a crowd or making a batch just for your family, peanut butter bars offer a delicious combination of convenience and crowd-pleasing flavor.
Easy Ways to Customize Your Recipe
Once you’ve mastered the classic version, you can experiment with different ingredients to create your own signature bars.
Try adding shredded coconut, chopped almonds, walnuts, or pecans for extra texture. Swirl caramel into the peanut butter mixture before chilling, or use dark chocolate for a richer topping. You can also mix in crushed cookies, toffee bits, or colorful candy pieces for festive occasions.
Small changes like these allow you to enjoy a new variation while preserving the classic peanut butter and chocolate combination that makes these bars so popular.
Peanut Butter Bars are a timeless dessert that combines creamy peanut butter, smooth chocolate, and simple ingredients into a treat that’s both comforting and irresistible. Their straightforward preparation, rich flavor, and endless customization options make them an excellent choice for beginners and experienced bakers alike.
Whether you prefer a traditional no-bake version, a crunchy variation with peanuts and pretzels, or a richer recipe with extra chocolate, these bars are guaranteed to satisfy sweet cravings. They’re easy to make ahead, simple to store, and perfect for sharing with friends and family.
The next time you’re looking for a homemade dessert that’s quick, dependable, and always a crowd-pleaser, Peanut Butter Bars are sure to become one of your favorite recipes.
Frequently Asked Questions
1. Can I make peanut butter bars without baking?
Yes. Many classic peanut butter bar recipes are completely no-bake and only require chilling in the refrigerator until firm.
2. Which peanut butter works best?
Regular creamy peanut butter is generally the best choice because it creates a smooth, stable texture. Crunchy peanut butter can be used if you prefer extra texture.
3. How long do peanut butter bars stay fresh?
Stored in an airtight container, they stay fresh for up to three days at room temperature, about one week in the refrigerator, or up to three months in the freezer.
4. Can I use dark chocolate instead of semi-sweet chocolate?
Absolutely. Dark chocolate adds a richer flavor and balances the sweetness of the peanut butter layer, making it a popular alternative.
5. Why is my chocolate layer cracking when I cut the bars?
Chocolate can crack if it hardens too much. Mixing a small amount of peanut butter or butter into the melted chocolate creates a softer topping that slices more cleanly.