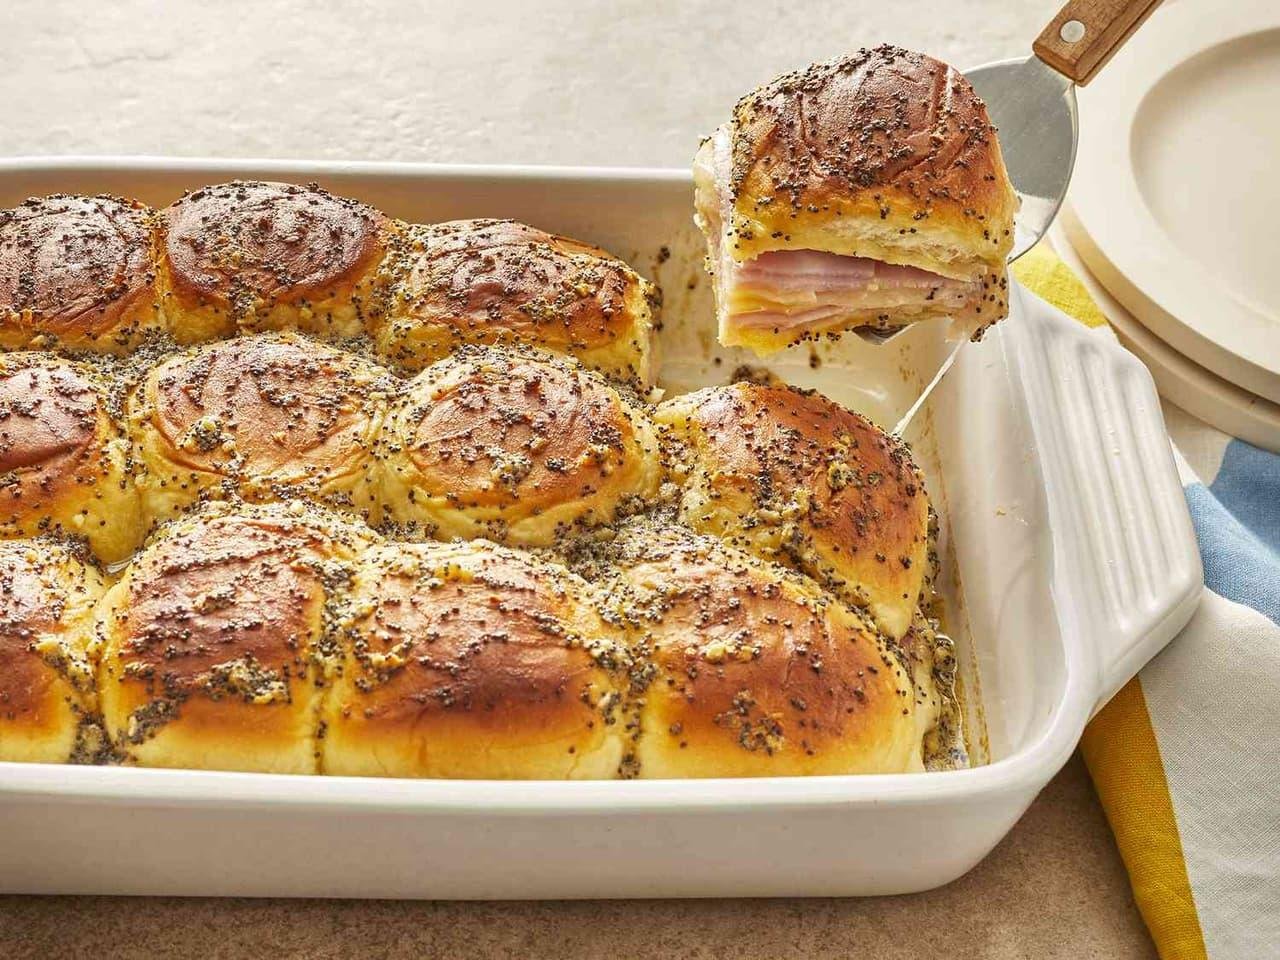
When you need a recipe that’s quick, satisfying, and guaranteed to disappear from the table, baked ham and cheese sliders are hard to beat. These warm, buttery sandwiches combine soft rolls, savory ham, melted cheese, and a flavorful glaze that bakes into a golden, irresistible topping. They’re simple enough for a busy weeknight dinner yet impressive enough to serve at parties, game days, holiday gatherings, and family celebrations.
One of the biggest reasons baked ham and cheese sliders have become so popular is their versatility. You can prepare them ahead of time, customize the fillings, and bake an entire batch at once. Whether you’re feeding a hungry family or entertaining a crowd, these sliders offer maximum flavor with minimal effort.
In this guide, you’ll learn everything you need to know about making perfect baked ham and cheese sliders, from choosing the right ingredients to avoiding common mistakes and creating delicious variations everyone will love.
What Are Baked Ham and Cheese Sliders?
Baked ham and cheese sliders are small sandwiches made with soft dinner rolls that stay connected as a single sheet. Layers of sliced ham and cheese are placed inside the rolls before they’re brushed with a buttery seasoned glaze and baked until golden and melty.
Unlike traditional sandwiches, these sliders are baked together, allowing the flavors to blend beautifully. The butter topping soaks into the bread while the cheese melts into the ham, creating a warm, flavorful bite every time.
Because they’re easy to assemble and serve, baked sliders have become a favorite recipe for birthdays, potlucks, tailgate parties, school lunches, and holiday meals.
Why Everyone Loves Baked Ham and Cheese Sliders
There are many reasons this recipe has become a household favorite.
First, they’re incredibly easy to prepare. Even beginner cooks can make them successfully with only a few ingredients.
Second, they’re perfect for feeding groups. Instead of making individual sandwiches, you prepare one large tray and slice it into portions after baking.
They’re also budget-friendly. Ham, cheese, butter, and rolls are affordable ingredients that create a filling meal without spending a lot.
Perhaps the biggest advantage is flexibility. You can change the cheese, use different meats, add vegetables, or adjust the seasonings to create your own version.
Ingredients That Make the Recipe Special
Simple ingredients work together to create the signature flavor of baked ham and cheese sliders.
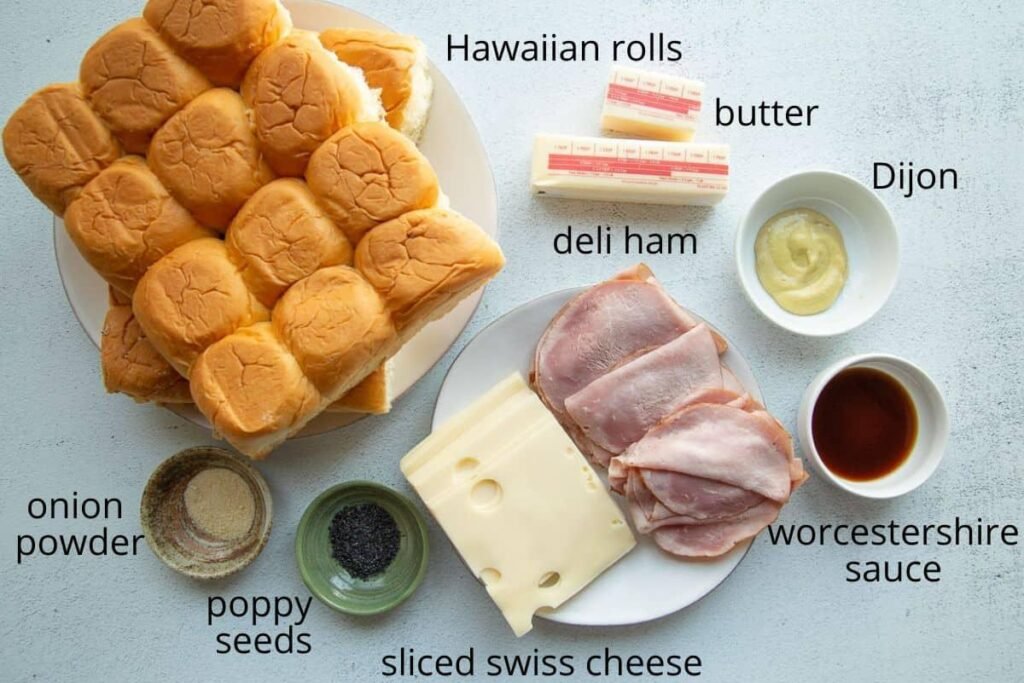
Hawaiian Sweet Rolls
Soft Hawaiian rolls are the most popular choice because their slight sweetness pairs perfectly with savory ham and melted cheese.
Their connected shape also makes assembly quick and easy.
If Hawaiian rolls aren’t available, brioche rolls, potato rolls, or soft dinner rolls also work well.
Ham
Thinly sliced deli ham is the traditional filling.
Honey ham provides a touch of sweetness, smoked ham adds deeper flavor, while Black Forest ham creates a slightly richer taste.
Avoid thick slices because they can make the sliders difficult to eat.
Cheese
Swiss cheese is considered the classic option because its mild, nutty flavor pairs naturally with ham.
Other excellent choices include:
- Cheddar
- Provolone
- Mozzarella
- Monterey Jack
- Havarti
Using freshly sliced cheese often produces a smoother melt than pre-packaged slices.
Butter
Butter forms the flavorful topping that gives baked sliders their golden finish.
As the butter melts into the bread, it creates a rich texture while helping the seasonings stick to the rolls.
Dijon Mustard
A small amount of Dijon mustard adds tanginess without overpowering the sandwich.
If you prefer a milder flavor, yellow mustard or honey mustard can be substituted.
Worcestershire Sauce
This ingredient adds savory depth and enhances both the ham and cheese.
Only a small amount is needed to make a noticeable difference.
Poppy Seeds
Poppy seeds add a subtle crunch and create the classic appearance found in many baked slider recipes.
Although optional, they contribute both texture and visual appeal.
Onion Powder and Garlic Powder
These seasonings enhance the buttery topping without overwhelming the sandwich.
Together, they create a balanced, savory flavor.
Choosing the Best Bread
Bread plays a major role in the final texture.
Hawaiian sweet rolls remain the top choice because they stay soft while developing a lightly crisp top during baking.
When selecting rolls, look for:
- Fresh texture
- Soft interior
- Even size
- Connected sheet of rolls
Avoid stale bread, which can become dry during baking.
How to Make Baked Ham and Cheese Sliders
Making baked ham and cheese sliders is simple, but following each step carefully produces the best results.
Step 1: Prepare the Rolls
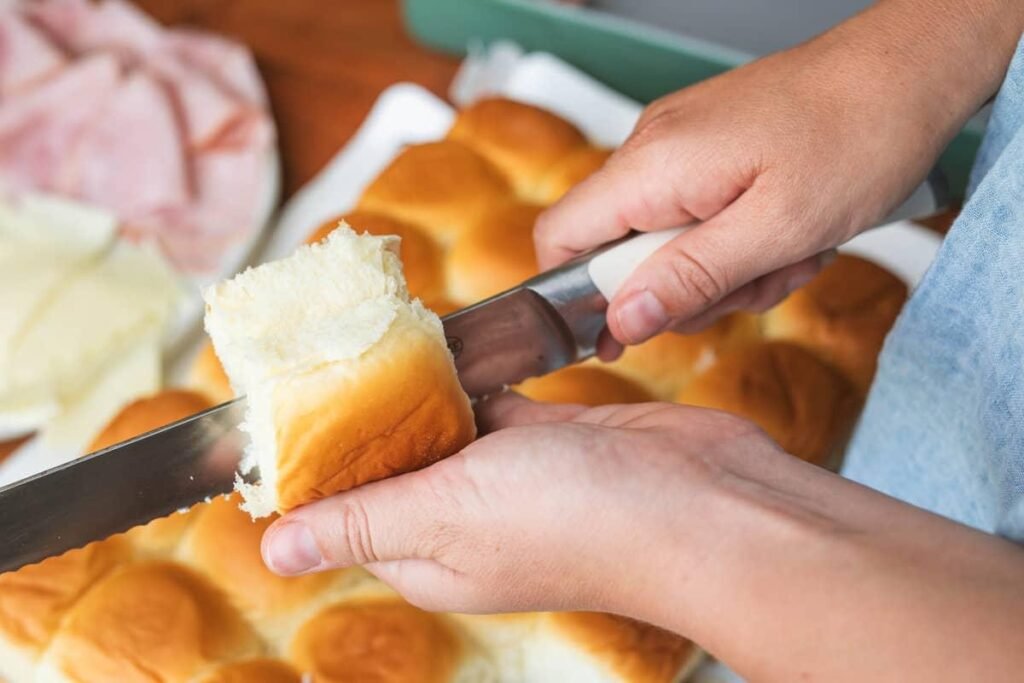
Preheat your oven to 350°F (175°C).
Without separating the individual rolls, slice the entire sheet horizontally using a serrated knife.
Place the bottom half into a lightly greased baking dish.
Keeping the rolls connected makes assembling and serving much easier.
Step 2: Layer the Ham and Cheese
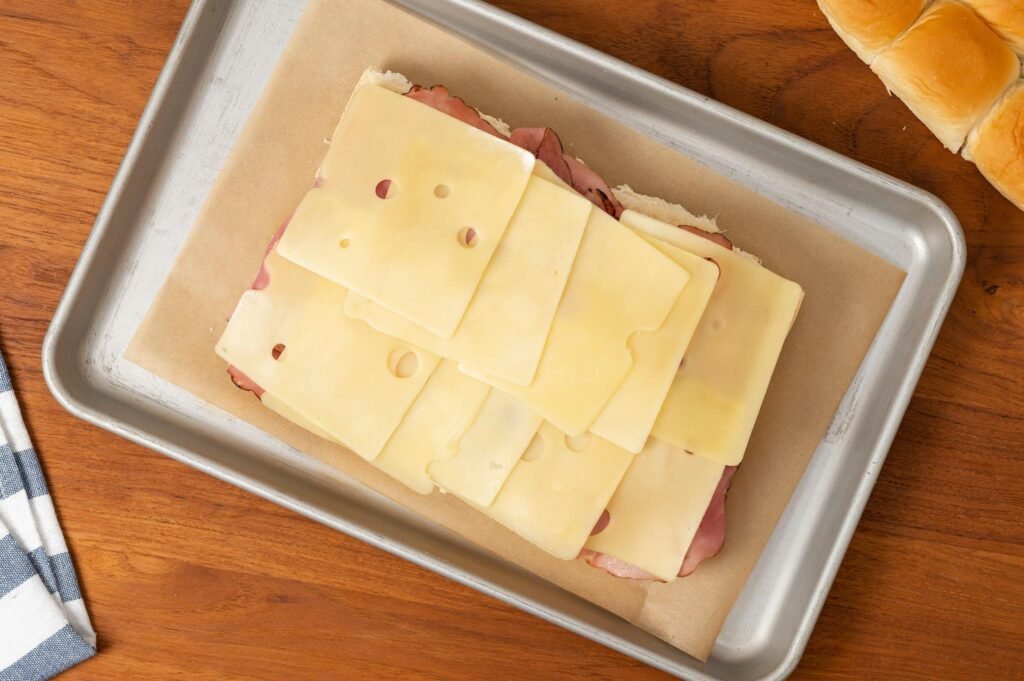
Arrange the sliced ham evenly over the bottom half of the rolls.
Spread the meat into an even layer so every slider contains a generous portion.
Next, place slices of Swiss cheese over the ham.
Cover the entire surface before placing the top half of the rolls back in place.
Step 3: Make the Butter Glaze
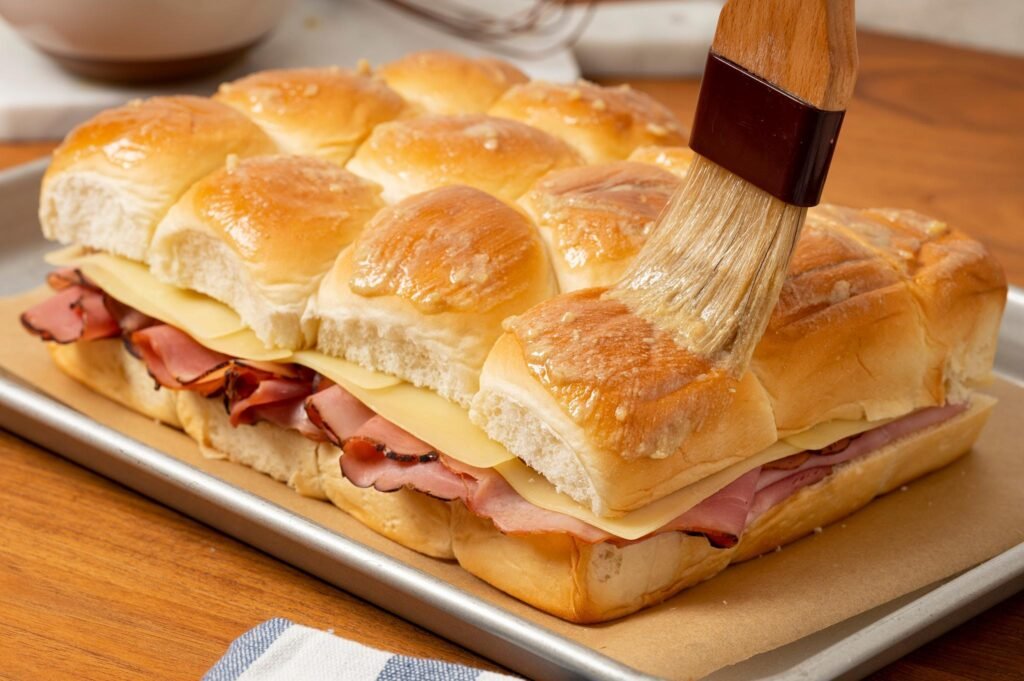
In a small bowl, combine melted butter with Dijon mustard, Worcestershire sauce, onion powder, garlic powder, and poppy seeds.
Whisk until everything is thoroughly blended.
Using a pastry brush or spoon, spread the butter mixture evenly across the tops of the rolls.
Allow some of the glaze to drip between the rolls for extra flavor.
Step 4: Bake Until Golden
Cover the baking dish loosely with aluminum foil.
Bake for about 15 minutes.
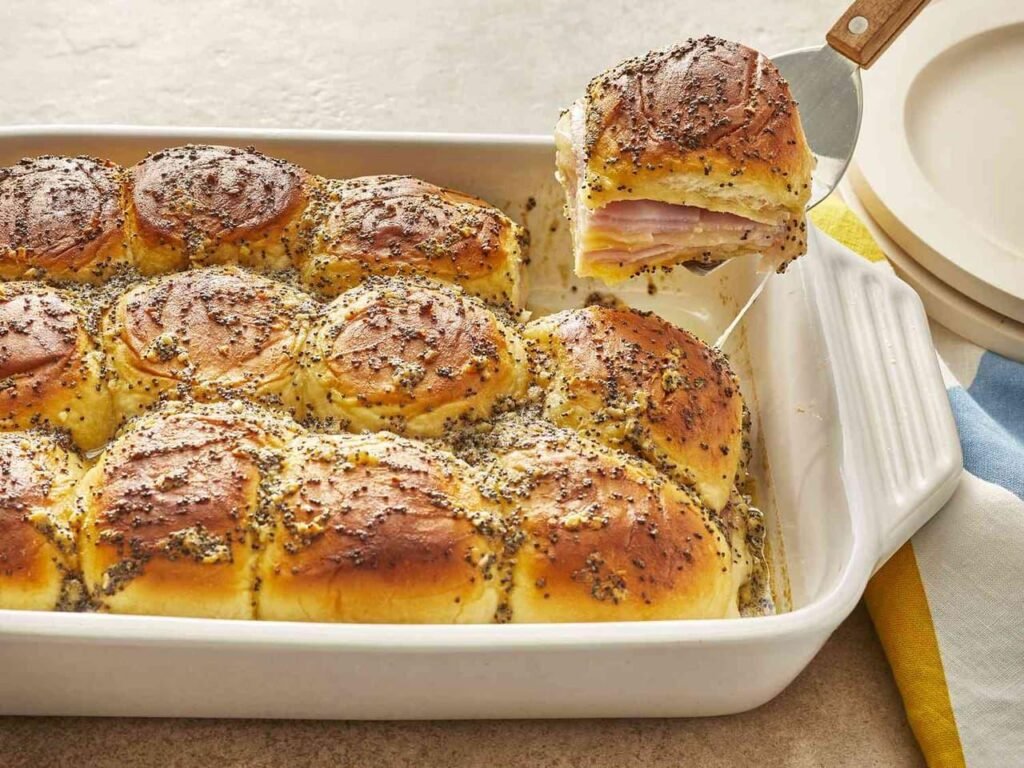
Remove the foil and continue baking for another 5 to 10 minutes until the tops become golden brown and the cheese has fully melted.
Allow the sliders to rest for about five minutes before slicing and serving.
Tips for Perfect Baked Ham and Cheese Sliders
Small details can make a big difference.
Use room-temperature butter so it mixes evenly with the seasonings.
Choose freshly sliced deli meat for better texture and flavor.
Don’t overload the sandwiches with fillings, as too much meat or cheese can make the sliders difficult to hold.
Brush the butter glaze evenly across every roll to ensure consistent flavor.
Let the sliders rest briefly after baking so the melted cheese has time to settle.
Delicious Variations to Try
Once you’ve mastered the classic version, there are countless ways to customize baked ham and cheese sliders.
Turkey and Cheese Sliders
Replace the ham with sliced turkey for a lighter option.
Swiss, provolone, or cheddar all pair well with turkey.
Roast Beef Sliders
Use thinly sliced roast beef with provolone cheese and a touch of horseradish sauce for a richer sandwich.
Chicken Bacon Ranch Sliders
Layer cooked shredded chicken with crispy bacon, ranch dressing, and cheddar cheese.
This version is especially popular for casual gatherings.
Italian Sliders
Combine salami, pepperoni, ham, provolone cheese, and Italian seasoning for a sandwich inspired by classic deli flavors.
Vegetarian Sliders
Skip the meat and use roasted vegetables like mushrooms, zucchini, spinach, and bell peppers with mozzarella or provolone cheese.
Common Mistakes to Avoid
Although this recipe is beginner-friendly, avoiding these mistakes improves the final result.
Using too much butter can make the bottoms soggy instead of lightly crisp.
Skipping the foil during the first stage of baking may cause the tops to brown before the cheese melts.
Using cold cheese directly from the refrigerator may slightly slow melting.
Overbaking dries the bread and toughens the ham.
Using thick slices of meat can make the sandwiches difficult to eat neatly.
Make-Ahead and Meal Prep Tips
One of the biggest advantages of baked ham and cheese sliders is that they can be assembled ahead of time.
Prepare the sandwiches several hours before baking.
Cover tightly and refrigerate.
When you’re ready to serve, brush on the butter glaze and bake as directed.
This makes them ideal for parties and holiday meals where saving time matters.
Storage and Reheating
Leftover sliders store well.
Allow them to cool completely before placing them in an airtight container.
Store them in the refrigerator for up to three days.
To reheat, place them in a 325°F oven until warmed through.
Avoid microwaving if possible, as the bread may become soft and chewy instead of lightly crisp.
What to Serve with Baked Ham and Cheese Sliders
These sliders pair well with a variety of side dishes.
Popular choices include:
- Potato chips
- French fries
- Coleslaw
- Pasta salad
- Potato salad
- Fresh fruit salad
- Pickles
- Garden salad
- Tomato soup
- Broccoli salad
For parties, serve sliders alongside a variety of appetizers and dipping sauces so guests can mix and match flavors.
Are Baked Ham and Cheese Sliders Good for Parties?
Absolutely.
Their convenient size makes them easy to serve without utensils.
Guests can grab one or two sliders while mingling, making them ideal for buffets and casual gatherings.
Since they’re baked in one dish, cleanup is also much easier than preparing individual sandwiches.
Whether it’s a birthday celebration, football watch party, family reunion, or holiday dinner, baked ham and cheese sliders are almost always among the first dishes to disappear.
Why This Recipe Belongs in Every Home Cook’s Collection
Every home cook benefits from having a few dependable recipes that work for nearly every occasion.
Baked ham and cheese sliders check every box.
They’re affordable, customizable, easy to prepare, and consistently delicious.
The recipe requires only basic cooking skills, yet the finished sandwiches look impressive enough to serve to guests.
Once you learn the basic technique, you can experiment with different cheeses, meats, seasonings, and sauces to create endless variations that suit your family’s tastes.
Baked ham and cheese sliders prove that great comfort food doesn’t have to be complicated. With soft, buttery rolls, layers of savory ham, perfectly melted cheese, and a flavorful seasoned glaze, these sliders deliver big flavor in every bite. They’re quick enough for busy weeknights, easy enough for beginner cooks, and impressive enough for holidays, parties, and game-day gatherings.
The best part is their versatility. You can stick with the classic combination or customize the recipe with different meats, cheeses, sauces, and vegetables to make it your own. By using fresh ingredients, baking them carefully, and following a few simple tips, you’ll have warm, golden sliders that everyone will reach for again and again. Whether you’re serving a family dinner or feeding a crowd, baked ham and cheese sliders are a recipe you’ll be happy to keep in your collection.
Frequently Asked Questions
1. Can I prepare baked ham and cheese sliders the night before?
Yes. Assemble the sliders, cover them tightly, and refrigerate overnight. Add the butter glaze just before baking for the freshest texture.
2. What is the best cheese for ham sliders?
Swiss cheese is the classic choice because it pairs beautifully with ham, but cheddar, provolone, Havarti, mozzarella, and Monterey Jack are also excellent options.
3. Can I freeze baked ham and cheese sliders?
Yes. Wrap the assembled or baked sliders tightly in foil and place them in a freezer-safe container for up to two months. Thaw in the refrigerator before reheating in the oven.
4. How do I keep the sliders from getting soggy?
Use only enough butter glaze to coat the tops, avoid overfilling with meat, and bake uncovered for the final few minutes so the rolls become lightly crisp.
5. What side dishes go well with baked ham and cheese sliders?
These sliders pair well with potato salad, pasta salad, coleslaw, chips, fries, soup, fresh vegetables, fruit salad, or a simple green salad, making them suitable for both casual meals and large gatherings.